
Push-Ups: Perfection and Progress
Push-ups are the most accessible and beneficial upper body exercise that exists, but also prone to be the most poorly executed. Let’s fix that so you can see progress without pain or frustration.
Modifications and progress:
Understanding that most people cannot do standard push-ups well, let’s address modifications. I do not like the knee push-up. I’ll explain why, what works better, and how to integrate modifications in a plan to make progress. First, though, let’s go through the standard push-up technique
We’ll also add some challenging varieties for the push-up pros (or those who soon will be!).
How to do Push-ups with Perfection
Standard Set up:
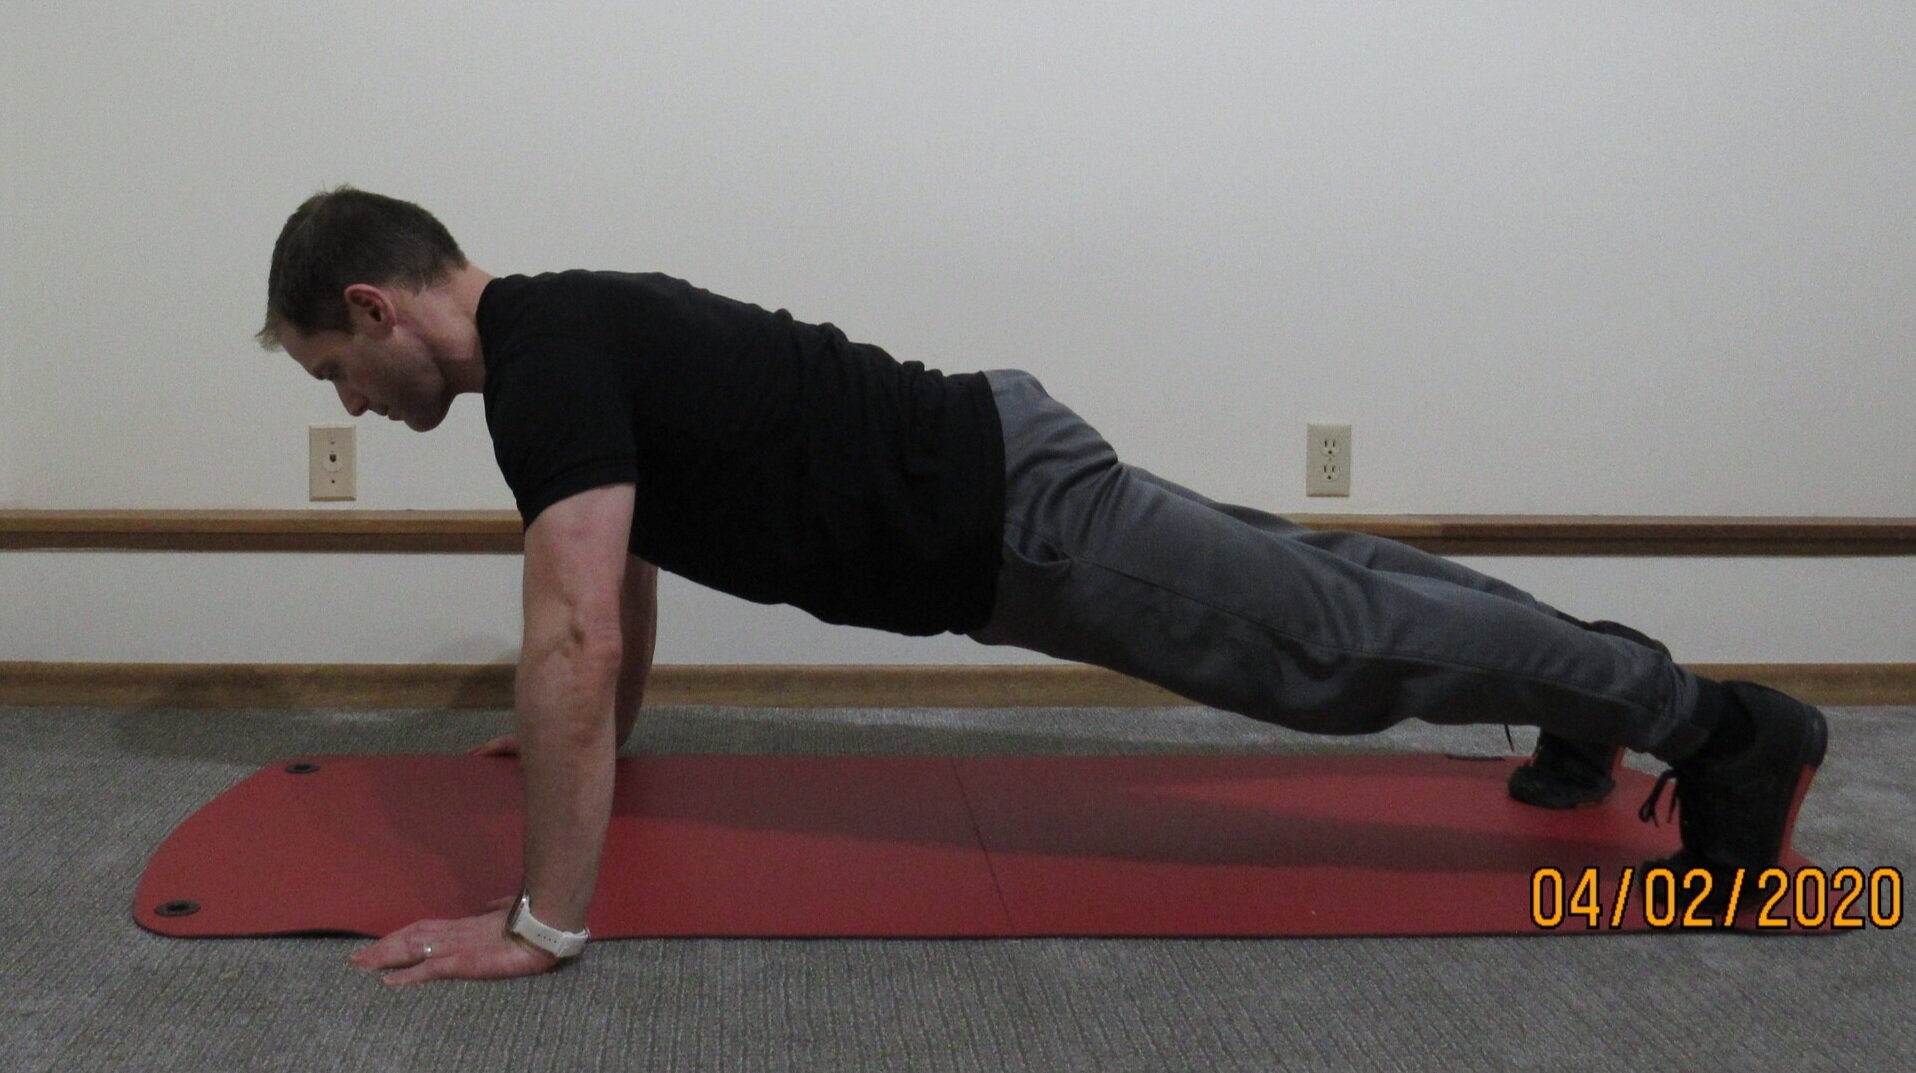
Standard Push-Up Start Position
Start with a high plank, but place your hands just slightly wider than your shoulders.
Look at your hands. Middle fingers should be pointed directly “up” forward, fingers spread. Imagine a line between your thumbs. Your mid-chest (armpit level) should be directly over that line.
Abs are tight, glutes are engaged, so you’re stiff as a board through the middle of your body.
Toes are hip-width, actively pressed into the floor.
Descent:
Eyes gaze straight down or just slightly forward, descend with control, lowering your chest between your hands.
Elbows should go out and back, making about a 45-degree angle with your body. Your elbow-arms-spine-to-neck should make an arrow, not a “T” (figure 1).
Ideally, your chest or shirt should contact the floor. A good, but reduced alternative is that your elbows pass just behind your ribs (figure 2 top).
It is important to have a full, and standardized range of motion to see any progress.
Push Up:
When you’ve finished your descent, push hard into your hands until your arms are straight.
Keep abs and glutes tight, so no back bend (figure 2) or elevated hips (figure 3). Done! Repeat!

Figure 1. Proper elbow and hand position.

Figure 2. Abdominals engaged for neutral spine.

Figure 3. Glutes active to maintain extended hips.
Push-Up Pain Fixes
Wrist pain: Try holding onto a bar, dumbbell handles, or placing the heel of your hand on something slightly elevated. Even a rolled up towel might help.
Back pain or instability: Check-in with your plank posture. You need firm abdominal engagement for what is essentially a moving plank. If you can hold a high plank for 30 seconds without sagging or pain, you can do a good push up by paying close attention.
Shoulder pain: If you have known shoulder problems, address that first and get cleared. If not, check your hand and elbow rotation. Elbows flared out to shoulder level (or above - yikes!) or fingers turned in is a shoulder injury on its way. Otherwise, consider using a book, rolled-up towel or mat to stop your descent 2-3 inches off the floor.
Can’t do standard push-ups? Not sure?
Here's how to modify and make progress
Here’s a test. Lie face down on the floor (the bottom of a push-up). Place your hands outside your chest, palms at nipple-line. Dig your toes into the floor. Tense your legs, glutes, and abs. Then, push! Are you up? If not, let’s modify.
At the beginning, I mentioned I don’t like knee push-ups. Here’s why: with knees bent, it is really difficult to avoid “backing out” of the bottom, bending at the hip. It makes the push-up less effective, puts the shoulder in a bad spot, and harder to progress. That said, sometimes it is the only option. If so, pay extra close attention to keeping abs tight and glutes active to keep your hips forward, tail-bone tucked.
A better way
Find an elevated, stable surface and work from there. Use the How to do Push-ups with Perfection instructions above but with a change of perspective.
Place your hands on the surface, and imagine the line of descent. Are your hands directly in front of your mid-chest? Move your feet so they are (hips straight, abs tight of course).
Choose a surface based on height: A counter top will work for most beginners, but let’s break it down in relation to you.
Waist-high:
Good for the novice pusher-upper. Use a counter, bookshelf, or dresser. In the gym, a Smith Machine squat bar set at that height works great. For someone very novice, you’ll be able to do a few here.

Waist-high counter, start position.

Waist-high counter, bottom of movement.
Hip / Upper thigh-high:
Handrails, half-walls, or back of a couch are this high. This is a similar difficulty to strict knee push-ups.
Mid-thigh:
Table, desk, arm of a couch or big chair. This will be a smidge harder than knee push-ups for most people.
Knee-high:
The seat of a firm chair or a bench. These are only a little easier than standard push-ups from your toes on the floor. You’re getting close!

Knee-high chair or box, start position.

Knee-high chair or box, bottom range of motion.
How to Progress
Follow this progression, and almost anyone can go from counter push-ups to full floor push-ups in 3-6 months!
Start with the level where you can do at least 6 with perfect form, 3 sets, with 60 seconds rest. Perform twice per week.
Add 1-2 repetitions per week, from 6 in week 1, to 7-8 week 2, 8-9, 10… until you can do at least 12 repetitions for all 3 sets. That should happen in 4-6 weeks.
The following week, attempt the next lower surface. You should be able to do 6-8 unbroken push-ups. If not, check that the height change wasn’t too big (6 inches) and try to find something in between.
Repeat Step 2 and Step 3. If you stop making progress, go back up a level and juste do 3 sets of 6 push-ups for one week, then restart where you got stalled. That “active rest” week should allow you to break through.
When you are at the point where you can do full standard push-ups for the first time, let me know! I want to celebrate with you!
Continue to increase repetitions until you can do 20+ without stopping or compromising form. That’s another celebratory milestone!
Beyond Push-ups
If and when you are past 20 standard push-ups, here are a few ways to increase the challenge.
Bench Press.
Change hand positions to very narrow or very wide.
Offset your hand heights. Place one hand on a book or step. Do a 6-8, switch hands.
De-stabilize one or both hands. Place one or both hands on a small ball or BOSU.
Elevate your feet. Use a small box or step up to 12 inches.
Get (a little) crazy. Feet on a BOSU, both hands on small, firm medicine balls. Have someone take a video.
What I don’t love is putting weight on your back. If you have weights, bench press. It’s too much hassle and too risky for your back to justify the very limited upside.
I also don’t encourage elevating your feet more than a little. It’s hard on the shoulders and back. If you can do 50+ push-ups with your feet on a BOSU, be satisfied that it’s an endurance exercise and I’ll help you find a better way to strength-train your press.
If you hit a milestone, or have a question about push-ups specifically or how to integrate them in your overall training plan, email me!